HW5: Projection Renderer
Due Thursday 1/28 @ 10:30am.
Where & What to Hand In
Remember that every source-code file you hand in must have a docstring at the top of it explaining what it is, what assignment it's part of, your name, the class name, the date, etc.
camera.py, submitted on Canvas.projection_renderer.py, submitted on Canvas.scene.py, submitted on Canvas. This file, when run, should pop up a window showing a wireframe rendering of your scene, and then, after the first window is closed, another window showing a rasterized rendering of your scene.scene.pdf, a file full of screenshots, submitted on Canvas. There should be at least five screenshots: one of a wireframe rendering, one of a rendering produced by Mayavi, and three produced by your raster renderer.
Note that it's important to always use exactly the specified filename when handing in work for a CS class. (Canvas may automatically append a number to your filename; that's okay.) For instructions on creating a screenshot file, see HW0.
Overview
For this assignment, you will build a projection renderer on top of your scenegraph work from HW4.
- Part 1: Add color to your HW4 scenes by inserting new “surface” nodes to the scenegraph.
- Part 2: Define the posing method for a camera and the transformations used to put world-space points into the canonical view volume.
- Part 3: Implement the perspective transform to make a simple wireframe rendering, built on top of Matplotlib's line-plotting capabilities.
- Part 4: Implement backface culling, z-buffering, triangle rasterization, and incidence-based coloring to directly render your own picture of the scene.
Part 1: Add Color to Your Scene
Download the updated scenegraph.py and _scenegraph_base.py, as well as the starter code scene.py. You'll also need your transforms.py from HW4 (or my solution code, which I'll send you once everyone has submitted HW4).
In makeScene(), combine your two scenegraphs from HW4 into a single scene, following the directions in the TODO comment. Add arguments to the signature of the function, and write a good docstring.
Then modify the scenegraph to include surface appearances for each shape instance in the scene, by inserting SurfaceNodes of your choice. Surface nodes located further down in the scene graph override ones further up.
Double-check yourself
To make sure that you're done with this step, temporarily add the following test code (which should not remain in your final submission) to main(). It should print out information about each object instance in your scene.
instances = scene.getCompositeTransforms()
for (inst_xform, node, surf) in instances:
  print "====="
  print node
  print surf, surf.color
  print inst_xform
Part 2: Camera Posing and Projection Transforms
2a: Investigate Object-Oriented Programming in Python
Download the starter code camera.py. For this portion of the assignment, you'll be filling in some definitions in the Camera class. Take the time to read over this class and figure out what's going on. Here are a few notes about object-oriented programming in Python:
- The special function
__init__(self, ...) is the constructor for objects of a particular class. (In Python it's called an initializer, but it's essentially the same thing.)
- The name
self in Python means pretty much the same thing as this does in Java.* So if you want to talk about the instance variable foo inside a method or constructor, you access it as self.foo. Unlike in Java, writing self. is always required; you can't leave it off.
- Any variable called
self.___ is implicitly defined as an instance variable of the class, regardless of where it's defined.† In particular, instance variables can only be defined in methods or the constructor; the name self doesn't mean anything in any other context.
-
Take a look at the last line of the constructor (where we call setPose()) and the method declaration (of setPose()) that follows it:
  def __init__(self, eye, look_at, up, near, far,
               view_angle_h=45, view_angle_v=45):
    # ... snip ...
    self.near = near
    self.far = far
    # ... snip ...
    self.setPose(eye, look_at, up)

  def setPose(self, eye, look_at, up):
    # ... snip ...
    eye = np.asarray(eye)
    look_at = np.asarray(look_at)
    up = np.asarray(up)

    self.eye = eye
This tells us that methods, like instance variables, are accessed by writing self.___. Notice that when we call setPose(), we pass in three arguments, but the declaration has four arguments. What gives? The first argument is automatically filled in. This is how each method knows which object self refers to.‡
If you'd like to explore this topic in a little more depth, please read my tutorial on object-oriented code in Python.
2b: Camera Posing
Now fill in the setPose() method for the Camera class, taking a position, look-at point, and up vector.
2c: Projection Transforms
Continuing with the Camera class, fill in the methods translateToOriginXform(), rotateAlignXform(), and perspectiveNormalizationXform(), worldToCameraCentricXform(), and worldToCanonicalViewXform(). You'll need your transforms.py from HW4 (or my solution code, which I'll send you once everyone has submitted HW4).
Note that, given the way the Camera class is defined, the perspective normalization transformation is simpler than the form written in the book. Don't just copy the answer from the book; simplify it as much as possible.
Part 3: Wireframe Rendering
Download the starter code projection_renderer.py. Before anything else, use your text editor to find all occurrences of the string “TODO”. Notice there are many TODO comments. The rest of the assignment consists of implementing the things marked with TODO comments, one by one, in order. To figure out what to do, you'll need to read the instructions here, the comments themselves, as well as the surrounding code and docstrings.
Read over the plotLines() function to understand what it does.
Now fill in the perspectiveView() function, to apply the compound mapping that takes vertices in object space to vertices in the canonical view volume (including perspective projection).
Once you've filled that in, go back to scene.py. In the main function, create a Camera to render your scene. Here's an example that matches the default viewpoint used by the Mayavi helper:
eye = [13.2, -41.2, 19.0]
look_at = [0, 0, 0]
up = [0, 0, 1]
im_width = 300
im_height = 200
camera = Camera(eye, look_at, up, 0.01, 100)
camera.setViewAngles(float(im_width)/im_height, 35)
After setting up the camera, call plotLines() to show a rendering of your scene.
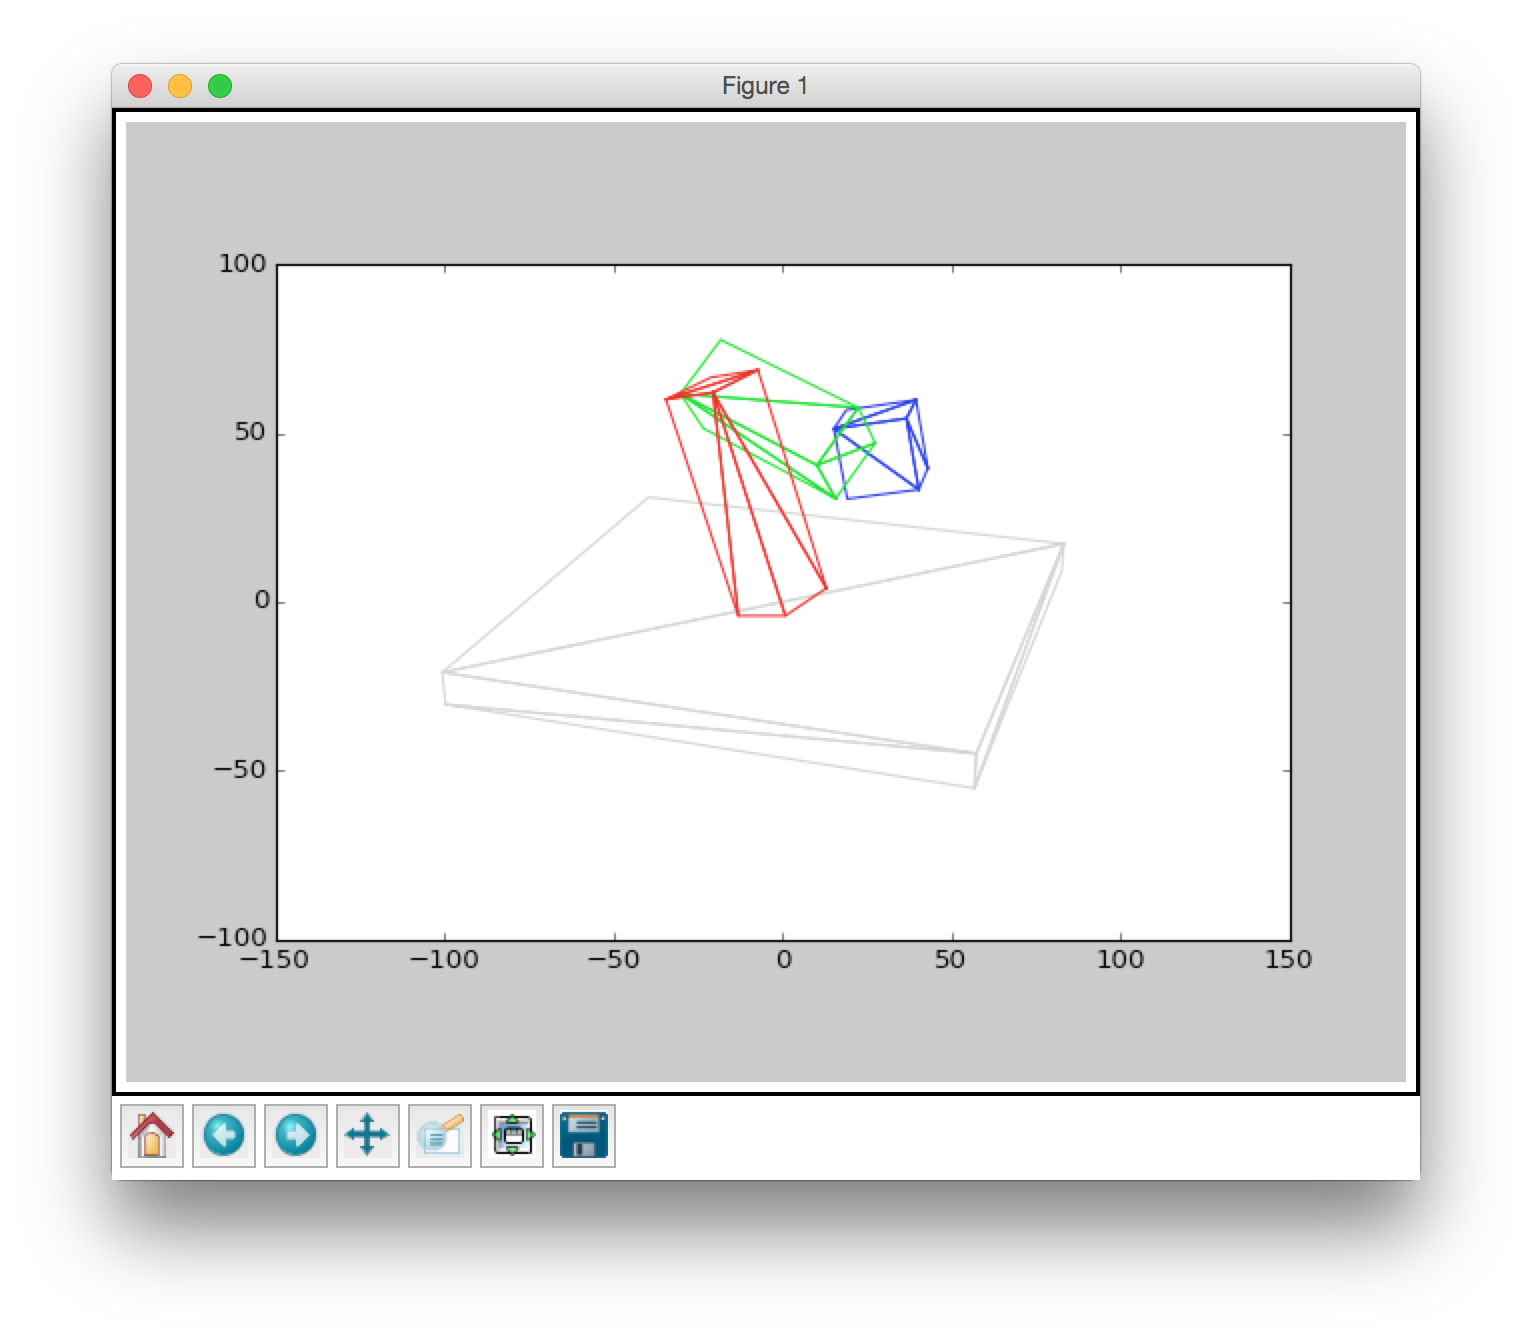
Take a screenshot of this rendered scene. Make sure you leave this code in place for your final submission: when run, scene.py should pop up the wireframe-view window first.
Here's an example screenshot for my robot-arm scene:
Double-check yourself
Compare how Mayavi renders your scene to the rendering produced above. Again, this is only testing code, and it should be fully removed from your final submission. Note that gfx_helper_mayavi and gfx_helper_plotting conflict with each other, so you should only import and use one of these at a time.
Comment out the import of gfx_helper_plotting and instead import gfx_helper_mayavi. Comment out your call to plotLines() as well. Then add this to main():
  fig = setUpFigure()
  for (inst_xform, node, surf) in instances:
    (verts, tris) = node.mesh
    drawTriMesh((inst_xform.dot(verts)), tris, fig, color=tuple(surf.color))

  showFigure(fig)
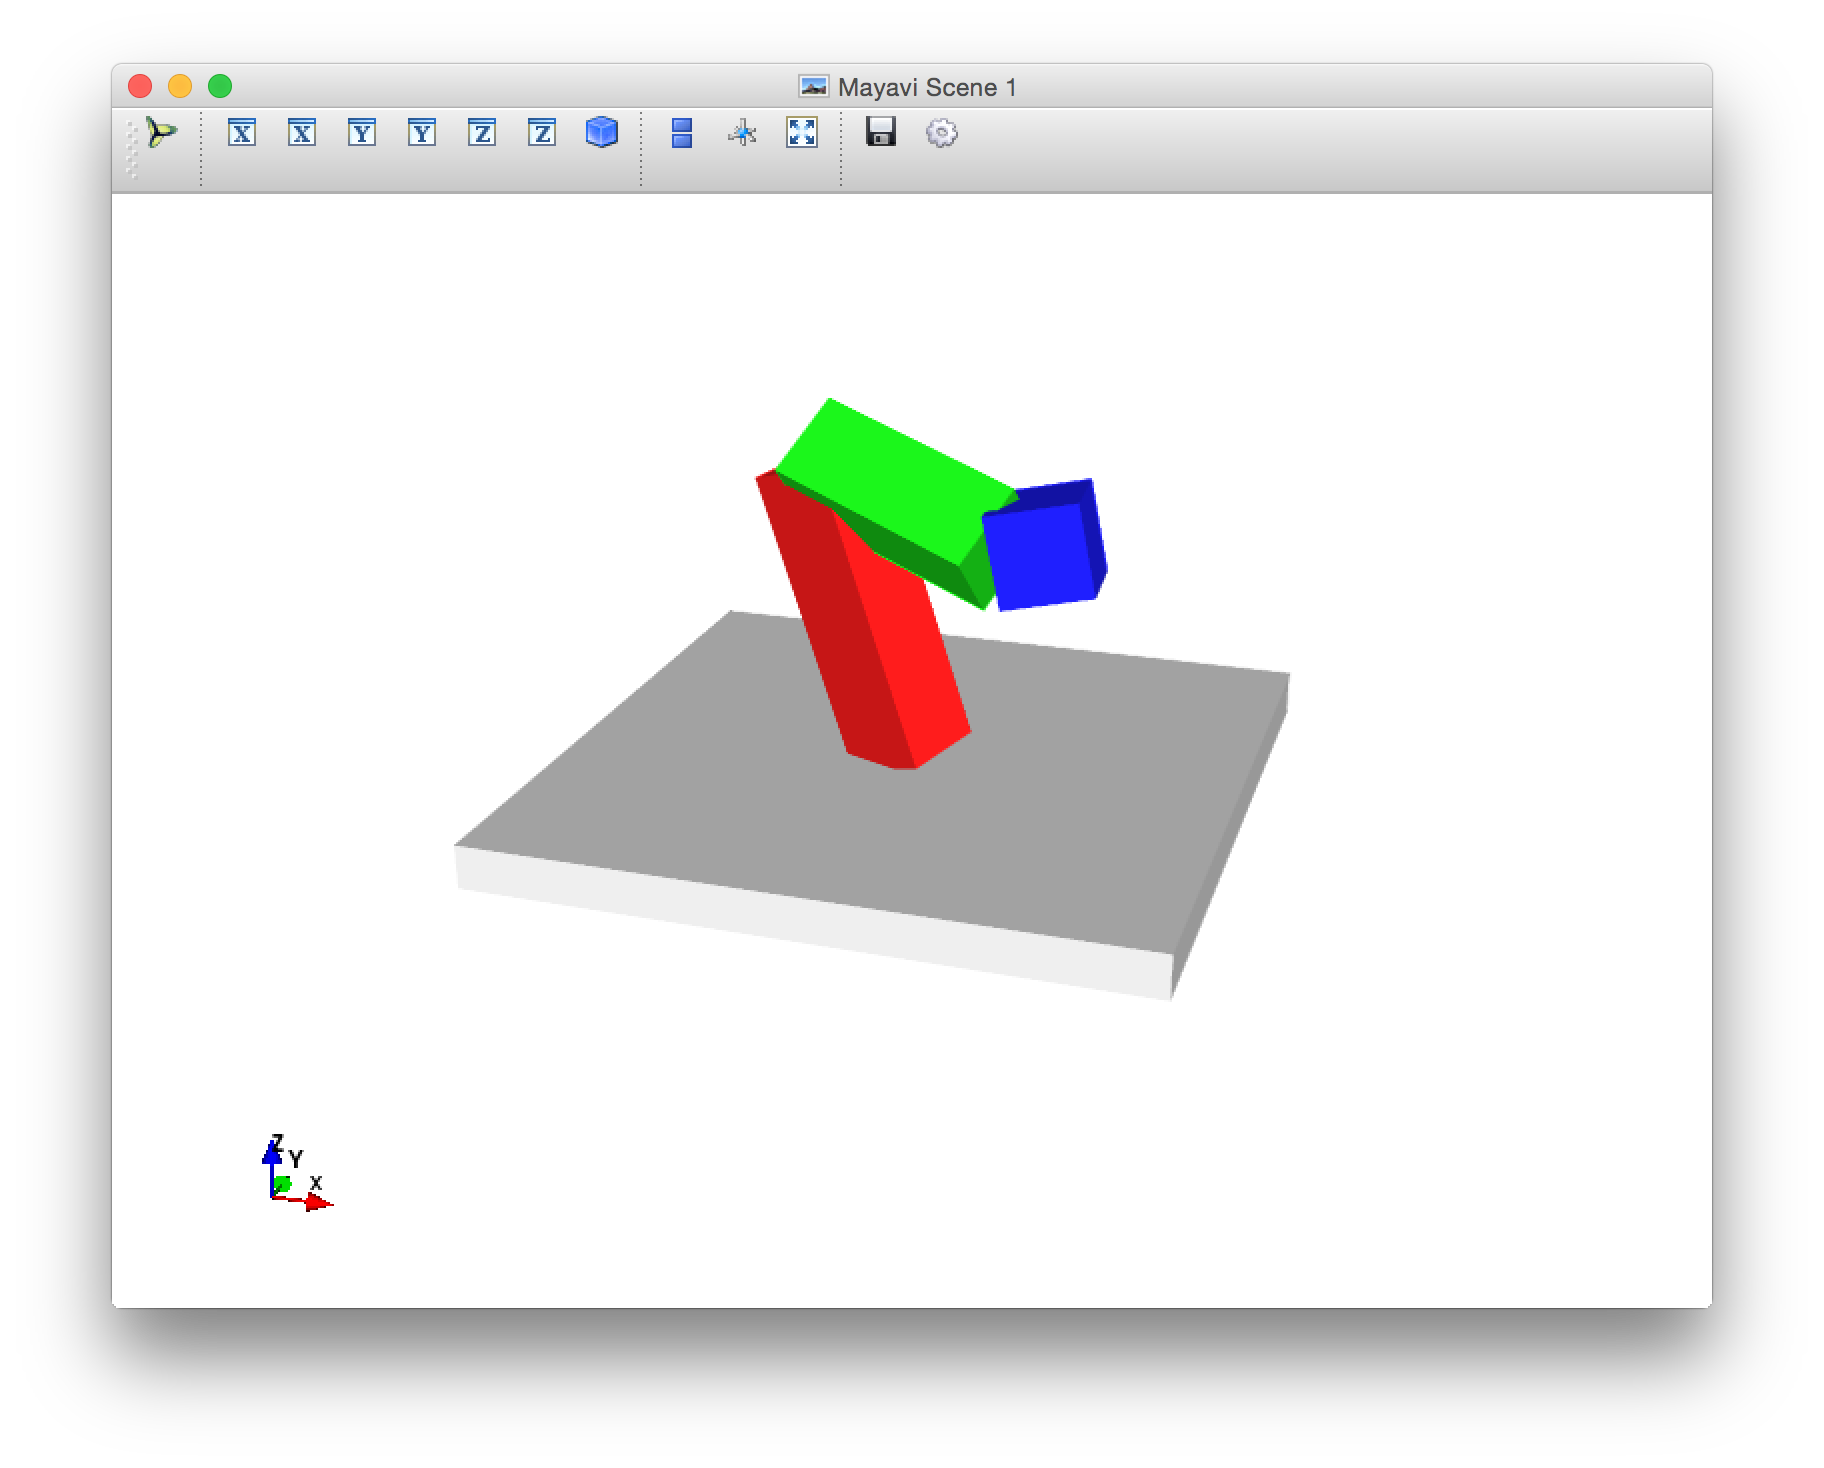
Take a screenshot of how the scene looks as rendered by Mayavi, and then remove this testing code.
Here's how Mayavi renders that same robot-arm scene:
Part 4: Rasterization
Fill in the rasterization-rendering functions in projection_renderer.py to implement backface culling, clipping, z-buffering, incidence-based shading, and triangle rasterization.
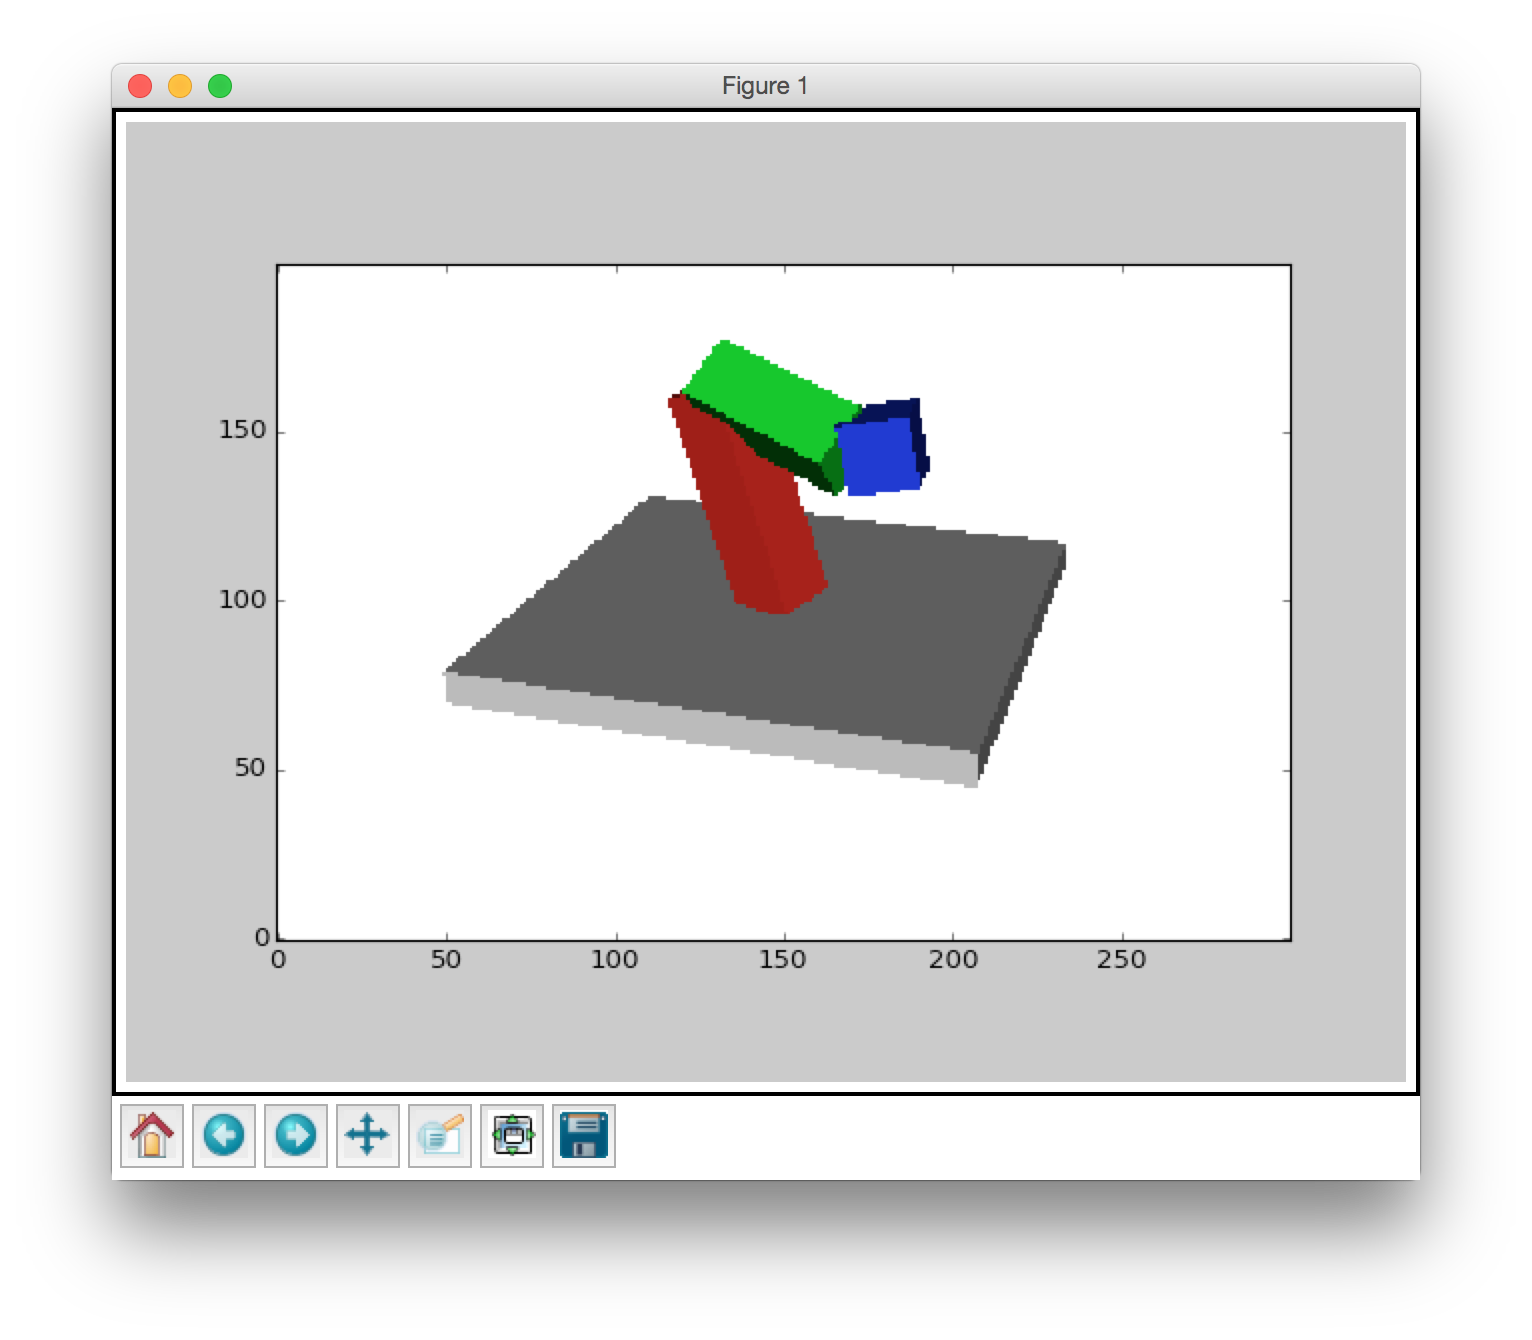
Here's a 300×200 rasterized image of the robot-arm scene produced by the routines that you'll fill in:
Before you start checking off TODO comments in projection_renderer.py, it's important to know where you're going.
- In projection_renderer.py, read all the way through
renderRaster(). Once you fill in all of that function, execution will reach the end, where rasterizeTriangle() gets called for each triangle. Read all the way through that function too.
- In scene.py, add a call to
renderRaster() to produce your image.
Now go through each TODO comment in projection_renderer.py, filling in the code indicated. Note that for many of these, there's already some placeholder code showing which variable you should create or modify.
First up are the TODOs in renderRaster(). The main job of this function is to convert from world coordinates to camera-centric coordinates, perform backface culling, shade each triangle's color according to its angle with respect to the viewer, and then (via helper functions) render each triangle into an image and z-buffer.
TODO: Use boolean indexing...TODO: Apply view-angle-based shading...TODO: Transform all the triangle vertices...TODO: Create the empty image... and the z-buffer...
Now fill in the TODOs in rasterizeTriangle(). The main job of this function is to convert a single triangle from canonical view coordinates to pixel coordinates in the rendered image, and then paint each pixel as necessary (according to fragment rasterization, view clipping, and z-buffering).
TODO: Define the mapping...TODO: Find the bounding box...TODO: Convert to a bounding box in image coordinates...TODO: For each (a, b) pair... There's no placeholder code for this one, as you have to decide how to implement the logic described.
Finally, fill in the TODOs in pointOnTriangle(). This is a helper function for rasterizeTriangle(). Its job is to use barycentric coordinates to decide whether and where a particular fragment lies on a triangle. I've filled in the math for computing the barycentric coordinates of the desired point on the triangle; you need to write code to use these coordinates.
TODO: Return None if...TODO: Use the barycentric coordinates...
As your very last step in this assignment, go back to scene.py and add code to display your rendered image. Use the drawImage() function from gfx_helper_plotting.
Take screenshots of your scene rendered in three different ways, each one with a different camera pose. In your final submission, leave the setup for the second and third cases commented out, so that when I run scene.py, just the first one gets rendered. Here are the requirements for your three renders:
- One view should match the wireframe rendering you made above. Render this as a 300×200 image (that's (width)×(height)).
- Pick another camera pose and a different view angle. Pick a different aspect ratio (not 3:2). The shorter side of your image should be at least 150 pixels wide. The longer side of your image should be no more than 500 pixels wide.
- Pick a camera pose, view angle, and aspect ratio of your choice (while still obeying the image size requirements above). Adjust the near and far clipping planes so that they clip away parts of your scene in an obvious way — a viewer should be able to easily spot this effect in the rendered image. If it's not totally obvious, add some text to your screenshot document to guide me in spotting it.
Rubric
This assignment is worth 20 points.
Criteria that just name a function are evaluated based on correctness of output on a variety of inputs. Correctness is defined with respect to the docstring in the starter code and/or the specifications in the assignment, including values, types, and array sizes of output.
| Criterion | Points |
|---|
| scene.pdf shows five screenshots meeting the specifications above. | 1 |
| When run, scene.py pops up two windows in sequence. | 1 |
| No extraneous code executes (not even print statements — leaving stuff commented out is okay), and no TODO comments remain for features that have been implemented. | 1 |
| Scenegraph includes robot arm and at least six other object instances of at least three different shapes. | 1 |
makeScene() has a complete, accurate, and well-formatted docstring. | 1 |
| Every instance in the scenegraph has a color, and most colors are distinct. | 1 |
Camera.setPose() | 1 |
Other Camera methods | 2 |
perspectiveView() in projection_renderer | 1 |
All TODO steps in renderRaster() | 2 |
All TODO steps in rasterizeTriangle() | 2 |
All TODO steps in pointsOnTriangle() | 1 |
| Triangles are correctly shaded. | 1 |
| Fragments in front of the near clipping plane, or behind the far clipping plane, are not drawn. | 1 |
| No z-order mistakes — every pixel shows an image of the triangle nearest to the camera. | 1 |
| Image comes out undistorted if the aspect ratio is correct. | 1 |
| A zoomed-in view fills the entire rendered image, with no index errors. | 1 |
| Total | 20 |
|---|